A Shopify store can be built in an afternoon, and most of them are. That is also why so many go live with a shipping rate that charges $3 on a $40 parcel, a password page still switched on, and no way to tell whether the first order came from an ad or a friend.
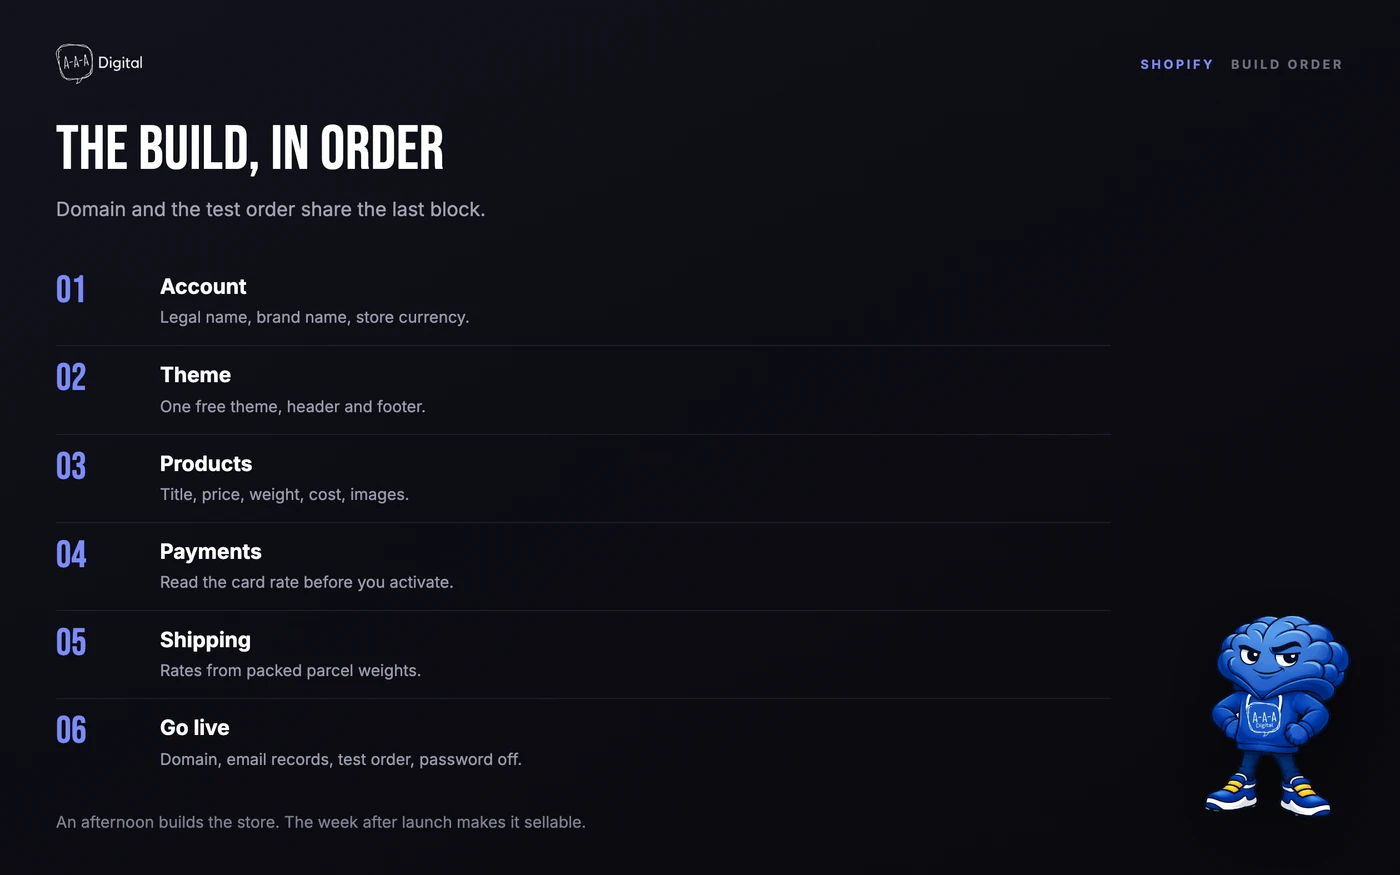
The build is not the hard part. The order is. Do these seven steps in sequence and you avoid the rework that turns a weekend project into a fortnight of fixing things you already published.
How long does it really take to set up a Shopify store?
Three to four hours gets a store that looks finished. Seven to ten days gets a store that can take money without embarrassing you, because half the work is decisions you cannot make alone: what shipping costs, which tax settings apply, whether your supplier can fulfil in the window you promised. If the supplier is a dropshipper rather than your own stock, the honest dropshipping maths changes those decisions.
Building is clicking. Testing is placing an order on an old phone, checking the confirmation email lands in the inbox rather than spam, and reading your own refund policy as a suspicious customer would.
What does Shopify cost before you sell anything?
Shopify's trial is three days free, then $1 a month for three months. That is the current offer on shopify.com/pricing, and it is the number most setup guides get wrong by quoting a 14-day trial that no longer exists.
After those months, the US monthly prices are $39 on Basic, $105 on Grow, $399 on Advanced, and from $2,300 on Plus. Paying yearly cuts them to $29, $89, and $359. Those figures move, so check the pricing page the week you commit, but the shape has been stable.
The plan fee is only half the running cost. Card rates decide the rest:
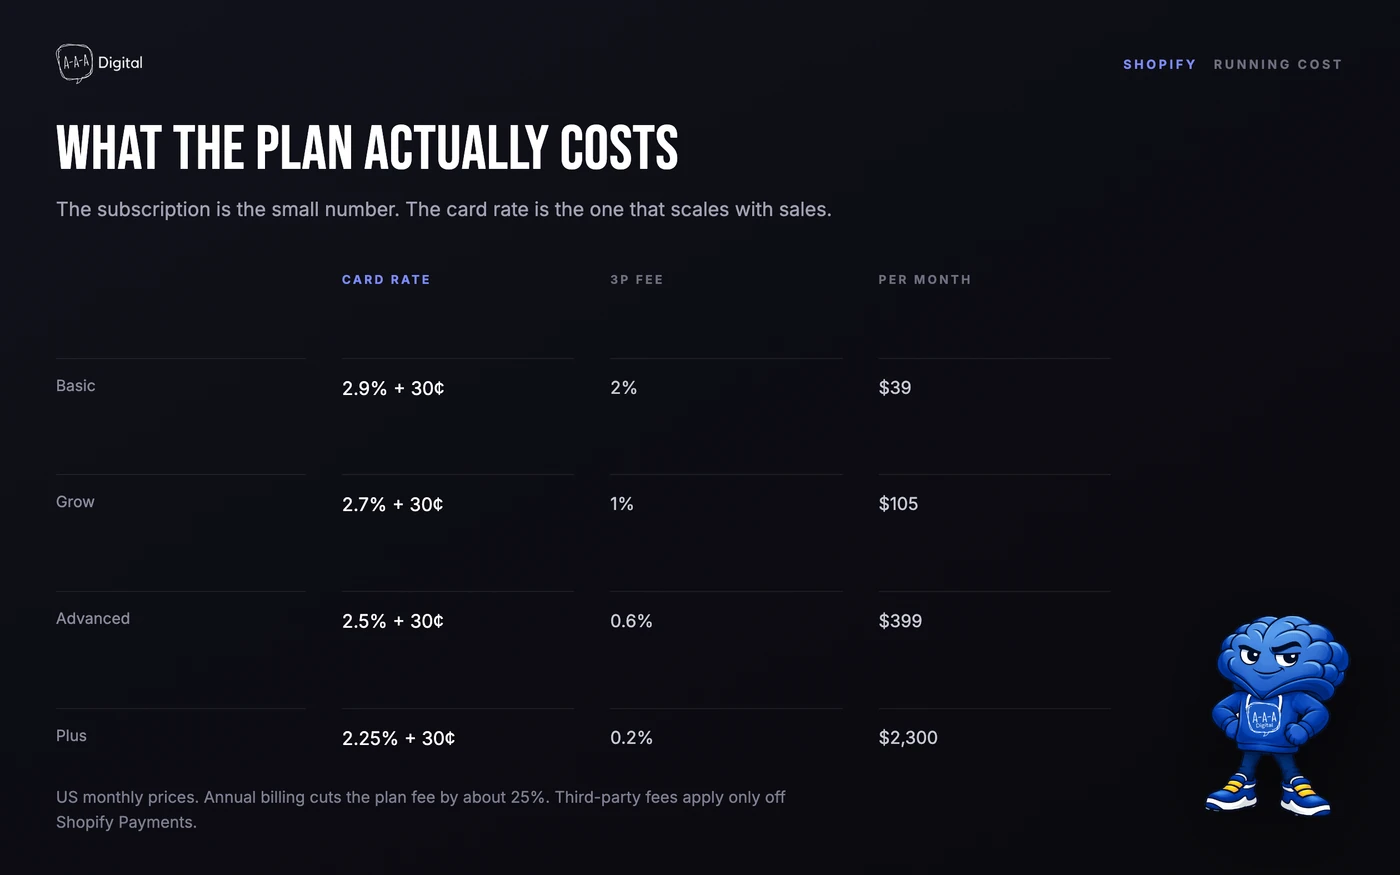
Basic charges 2.9% plus 30 cents online, Grow 2.7% plus 30 cents, Advanced 2.5% plus 30 cents, Plus 2.25% plus 30 cents. If you use a payment provider other than Shopify Payments, Shopify adds a transaction fee: 2% on Basic, 1% on Grow, 0.6% on Advanced, 0.2% on Plus. A store doing $10,000 a month on Basic pays $290 in percentage fees alone, before the 30 cents an order, which is more than seven times the subscription.
Every plan sells unlimited products and includes ten inventory locations. What changes with price is seats, reports, and rates: Basic includes no additional staff accounts, Grow adds five, Advanced fifteen. Our breakdown of the real Shopify bill covers the app and theme costs on top.
Step 1: Create the account and answer the three questions it asks
Sign up with an email and password, then answer what you are selling, where you are selling, and what you want to call the store. None of it is binding except the store name, which becomes your permanent your-store.myshopify.com address.
Two decisions are worth taking slowly. Use your legal business name in billing, not the brand, because that is what appears on invoices and in payment disputes. And set the store currency deliberately: it is the currency your prices, reports, and payouts are kept in, and nobody wants to revisit it after a year of orders.
Our guide to changing a Shopify store name explains which of the three names is which, and which one never moves.
Step 2: Choose one free theme and stop
Shopify's free themes are good enough to launch on. Dawn, Refresh, and Craft are built for speed and support the sections most stores need. Pick one, upload your logo, set two fonts and a colour palette, and move on.
The mistake is customising before there is anything to customise. A homepage designed around three placeholder products gets redesigned the week you add thirty. Set the header, footer, and product card, then leave it until the catalog exists.

Step 3: Add products that can actually be shipped
A product needs a title and a price to exist. To sell, it needs a weight, a cost per item, at least four images, and a description that answers what the photo cannot: how big it is, what it is made of, and what happens if it arrives damaged.
Weight is the one beginners skip, and it breaks shipping rates later. Weigh the packed parcel, not the product. The field-by-field walkthrough is in our guide to adding products to Shopify, including the variant limits that catch people adding a size run.
Step 4: Turn on payments and read your own rate
Go to Settings > Payments and activate Shopify Payments if your business is in a supported country. Shopify publishes the list: around forty countries in total, including the US, UK, Canada, Australia, and most of the EU. If you sell from India, you cannot use it yet and will need a third-party gateway, which brings the 2% Basic transaction fee with it.
Read the rate before you activate, not after. The gap between 2.9% and 2.5% is small per order and large per year, and it is the main reason a store outgrows Basic before it outgrows the feature list.
Step 5: Set shipping from parcel weights, not guesses
Build one shipping zone for your home country first, then add international zones once you know the landed cost. Rates come in three useful shapes: flat rate, weight-based, and free over a threshold.
Set the free shipping threshold just above your average order value, not at it. If the average order is $48, a $60 threshold lifts the basket instead of giving away margin on orders that would have converted anyway. Then check the maths on your heaviest product, because that is the parcel that turns a profitable rate into a loss.
Step 6: Connect the domain and the sending address
Buy a domain through Shopify or connect one you own, then set it as the primary domain. A store can hold up to 20 domains and subdomains, and Shopify issues a free TLS certificate for each, usually within a few hours of the DNS records resolving.
Then fix the email. Order confirmations from a generic address land in spam, and a customer who never sees the confirmation assumes the order failed. Add your domain to the sending settings and publish SPF and DKIM records with your DNS provider before launch, not after the first support ticket.
Step 7: Place a real test order, then remove the password
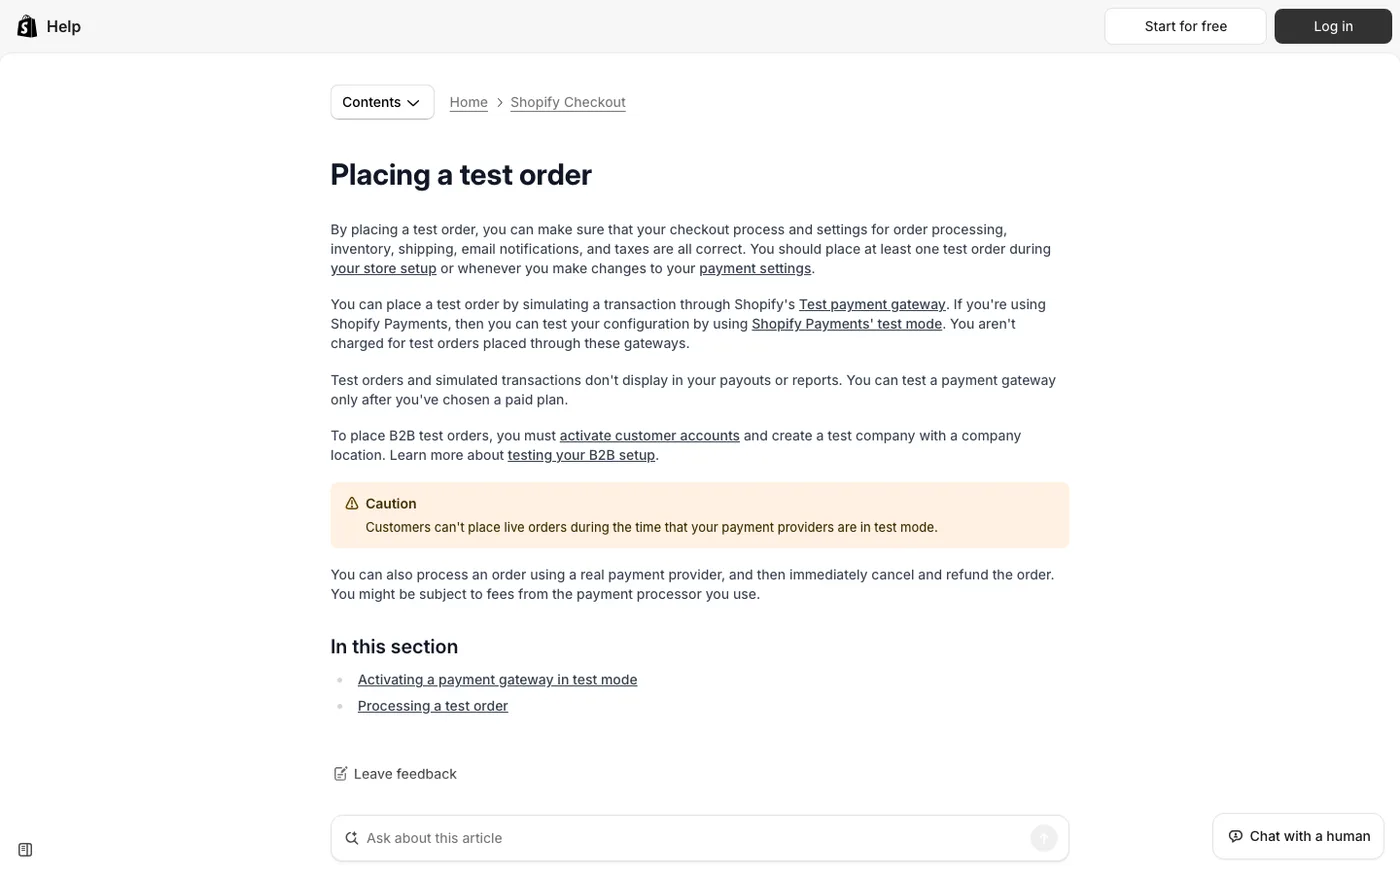
Use Shopify's test gateway or Shopify Payments test mode, and place an order the way a customer would: on a phone, with a real address, choosing the cheapest shipping rate. Test orders do not appear in payouts or reports and you are not charged for them. One catch: you can only test a gateway after choosing a paid plan, which is why this sits at the end of the trial.
Check the confirmation email, the order in the admin, the inventory count dropping, and the fulfilment flow. Then go to Online Store > Preferences and remove the password. That action makes the store public, and our guide to the Shopify password page is worth reading before you click it.
What has to be true before you remove the password?
Five things, and all of them are trust rather than design:
- Policies exist. Refund, privacy, terms, and shipping. Shopify generates templates; edit them so they describe your actual returns window.
- Taxes are configured. Check whether your prices include tax and confirm the rates for the regions you ship to. Getting this wrong shows up as a margin surprise, not an error message.
- A contact route works. A form that sends, and an address someone reads.
- Analytics is live. Install GA4 and confirm you can see yourself in real time. Our Shopify GA4 setup guide covers the events worth tracking from day one.
- Search basics are done. Title tags, meta descriptions, and a sitemap in Search Console. The Shopify SEO checklist is the short version.
What should you fix in the first week after launch?
The store will work. It will not convert, and that is normal. Week one is for five fixes that pay fastest.
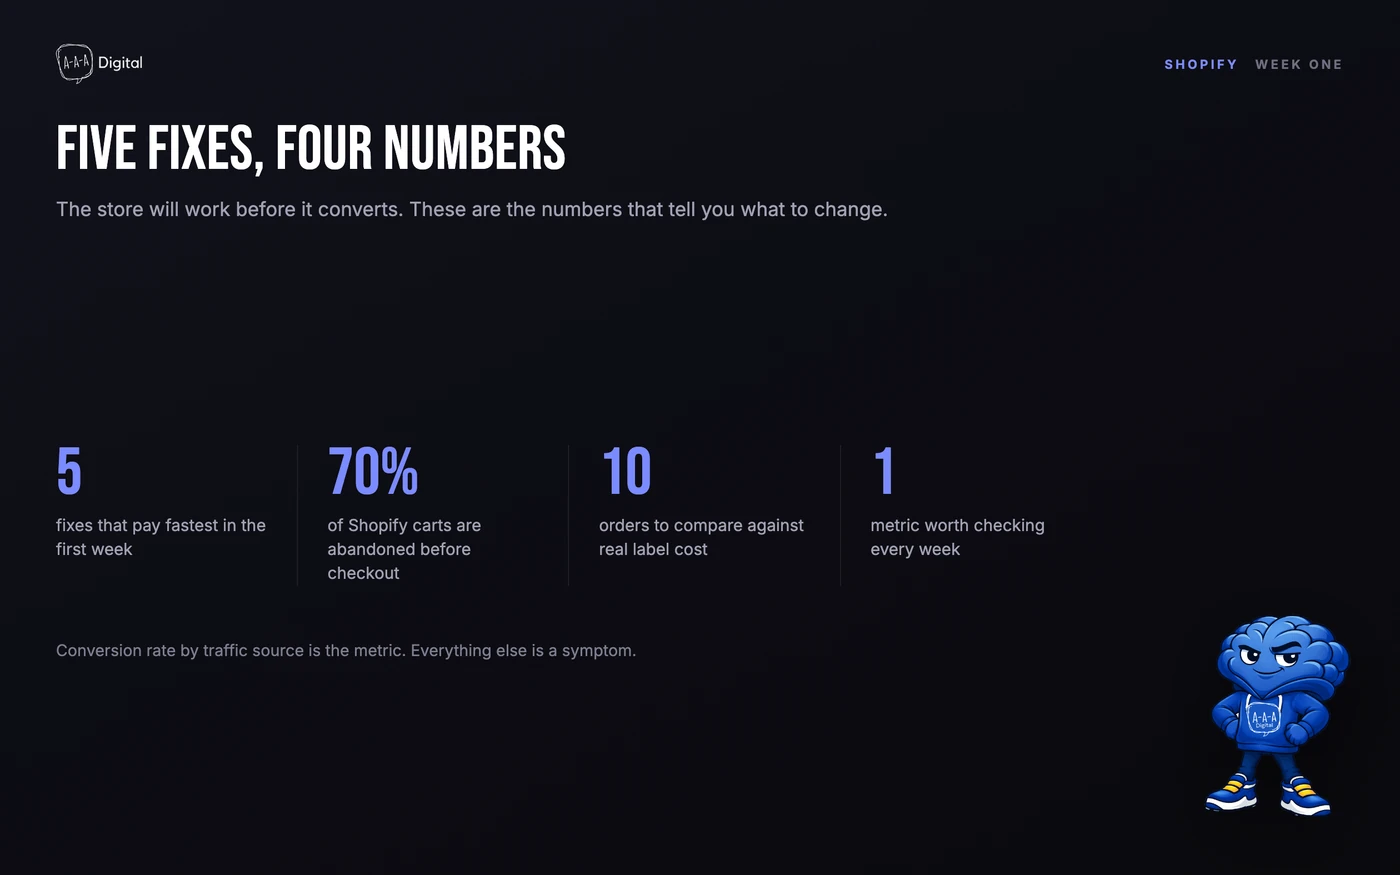
Speed. Check the homepage and a product page on a throttled connection. Images are almost always the cause, and resizing them is free. Our guide to Shopify page speed has the order of operations.
Product page structure. Photos, price, variant picker, delivery promise, reviews. If add to cart sits below the fold on a phone, fix that before anything else.
Abandoned checkout. Turn on the recovery email. It is built in, free, and recovers a small real slice of the 70% of carts that never complete.
Shipping charge against label cost. Compare what you charged with what the label cost for the first ten orders, then adjust before the error compounds.
One number you trust. Pick a single metric, usually conversion rate by traffic source, and check it weekly. Before you put money into ads, run the assumptions through the Shopify ROI calculator so you know what a click has to be worth.
Frequently Asked Questions
How much does it cost to set up a Shopify store?
Three days free, then $1 a month for three months, then $39 a month on Basic in the US, or $29 if you pay yearly. Budget separately for a domain, a paid theme, apps, and card fees of 2.9% plus 30 cents on Basic.
How long does it take to set up a Shopify store?
An afternoon for a store that looks complete, about a week for one that is ready to sell. Payments, shipping, tax, and testing take longer than the theme because they depend on your supplier and your bank.
Do I need a custom domain to launch?
No, but have one before you run traffic. The myshopify.com address works for testing and undermines trust the moment a customer sees it at checkout. A domain is the cheapest credibility you can buy.
Can I set up a Shopify store without a developer?
Yes. Themes, products, payments, shipping, and domains are all admin tasks. A developer earns their fee on custom sections, unusual shipping logic, or a migration, not on a standard first store.
What should I do immediately after launching?
Place a real order, watch the confirmation email arrive, and check the order appears in your admin with inventory moving. Then connect analytics, submit your sitemap, and leave the design alone for two weeks while you collect data.
Setup is the part every guide covers. What decides whether the store earns anything is the ninety days after the password comes off. If you would rather not find that out by experiment, our Shopify development team builds launch-ready stores and hands over the admin with the settings documented.
